 |
 |
 |
 |
 |
 |
|
 |
 |
 |
 |
 |
||
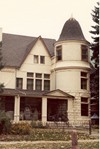
Roof to Wall Intersections
There have always been problems with the flashing
details at the roof to wall intersections of Head Walls,
Rake Walls, and Chimneys -
especially if Brick or Stone Veneer or Stucco is used.
Ever wonder why Exterior Wall Coverings wear out so fast at the roof line many times causing the property owner to replace the exterior wall covering prematurely? It is because the intersection between the roof and the exterior wall covering is not properly installed and flashed. This oversight has been going on for years and costing property owners many thousands of dollars.
For several years now a moisture barrier has been installed over all the walls, commonly called a House Wrap, before any type of Exterior Wall Covering is installed. This house wrap should be installed over the top of a "Through the Wall Flashing" to shed the moisture that gets behind all Exterior Wall Covering materials, then back out onto the roof surface.
Here are the some example problems with the way most Roof to Wall Intersections are flashed:
Often with new construction the roof flashing is first nailed to the wall. Then the house wrap and exterior wall coverings are installed over this roof flashing. There sometimes is a problem with movement differences of the wall and the roof decking when the flashing is fastened to both the wall and the roof.
Many times the roof flashing needs to be adjusted to the coursing of the roof covering and sometimes replaced because it was damaged or for some other reason. This cannot be properly accomplished without removing the exterior wall covering.
Often the Exterior Wall Covering is placed directly onto the surface of the roof when it must be a minimum 1 1/2" off the roof's surface. Some manufacturers of Exterior Wall Coverings require a minimum of 2" above the roof's surface. (See http://www.jameshardie.com/d2w/best-practices/quick-start-hz5-us-en.pdf) This helps prevent the Exterior Wall Covering from prematurely deteriorating from soaking up moisture, freeze/thaw effect, etc. Other times the house wrap and the Exterior Wall Covering do not properly overlap the top of the roof flashing a minimum of 2".
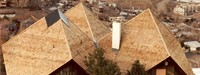
When replacing the roof covering in the future there is another problem roofers are faced with. How can the roofing contractor properly replace the roof insuring that the new underlayment and roof flashing are extended up the wall the proper distance and are properly overlapped by both the house wrap and the Exterior Wall Covering. Both the Building Code and good roofing practices require this. By the way, roofs get replaced frequently here in Colorado, my guess is every 10 to 15 years for many.
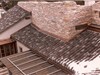
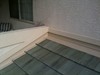
The stucco wall pictured above is brand new. The homeowners had this done just before they were to have a new roof installed. Good idea, but they did not rectify the flashing situation when they had a chance to do so.
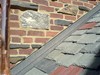
This is the major problem that frequently occurs when replacing a roof that has Stucco, Brick, or Stone veneer. The old roof on this structure was cedar shakes. The existing step flashing shown here is rusted, has holes in it, and is placed on a 10" weather exposure; the correct distance for cedar shakes but not for the new asphalt shingle roof covering. This old existing roof to wall flashing should have been removed. It now cannot be pulled out from behind the stucco because the weep screen at the bottom of the stucco is attached to the wall with nails going through this existing roof to wall flashing.
The new roof is going to be laminated asphalt shingles. The new step flashing must extend up the wall a minimum of 5" and must be laced with each course of the new asphalt shingles. The shingle's weather exposure is 5". The new step cannot be inserted up behind the stucco and house wrap because the weep screen at the bottom of the stucco is attached to the wall with nails going through this existing roof to wall flashing. For the same reason, the new underlayment cannot be extended up the wall as is required.
The roof flashing cannot be installed on the outside of the stucco and counter flashed. The water that does penetrate behind the stucco will then be trapped there or worse; forced down the inside of the walls and ceilings possibly causing damage and mold.
Below are more photos of Poor Flashing at Roof to Wall Intersections with different Exterior Wall Covering materials.
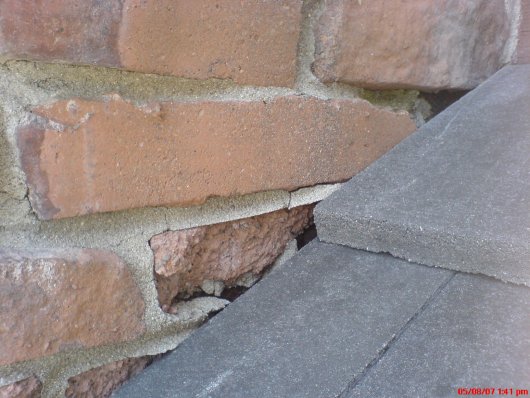
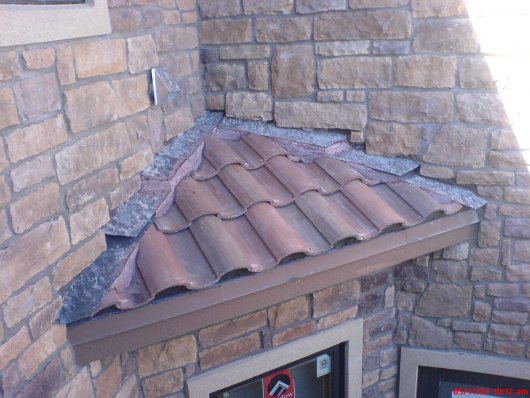
Here Stone Veneer is installed below the surface of the tile roof where freeze thaw cycles are tearing the mortar apart.

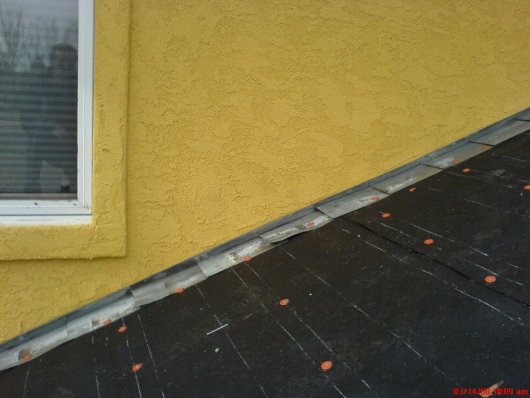
Yes, even flat roof to wall intersections are not being properly done.
The flat roofing material must go up the wall a minimum of 12"
or up the wall
and over the top of the wall if the wall is less than 12" high.
Here is an attempt, though maybe not a very good one, to make the roof flashing serve also as a "through the wall flashing" with a tile roof.

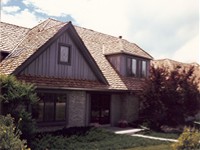
Lets not leave out the Exterior Wall Covering made of wood lap siding.
Did you know
one of the main reasons wood siding has to be replaced before its time is
because it rots at the intersections with the roof.
A few more years here
and the exterior wall covering will need to be replaced.
The Solution
The only way to properly drain the the water that gets in behind the Exterior Wall Covering back out onto the roof's surface is to cut out the existing exterior wall covering being careful not to cut the house wrap.
Then the best solution to properly drain any moisture that gets behind the siding is to install a "Through the Wall Flashing" called a "Z" Bar Flashing.
This Through the Wall (Z Bar) Flashing is placed over a piece of minimum 5 1/2" in height Vertical Blocking/Backing Material that is the same thickness or just slightly less than the thickness of whatever type of Exterior Wall Covering that is being used. Why 5 1/2"? Because most roof flashing is required to extend up the wall a minimum of 5". Most Contractors simply use a nominal 6" piece of lumber to obtain the minimum 5 1/2" height.
The Roof to Wall Flashing is then placed up behind this Through the Wall (Z Bar) Flashing on the outside of the Vertical Blocking/Backing Material.
The Exterior Wall Covering material is then kept off the surface of the roof. This way, each time in the future when the roofing material is replaced the Stucco, Brick, or Stone Veneer, lap siding, etc. will not need to be cut out and replaced.
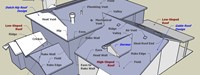
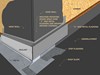
Below is a sketch of what the flashing at roof to wall intersections should look like.
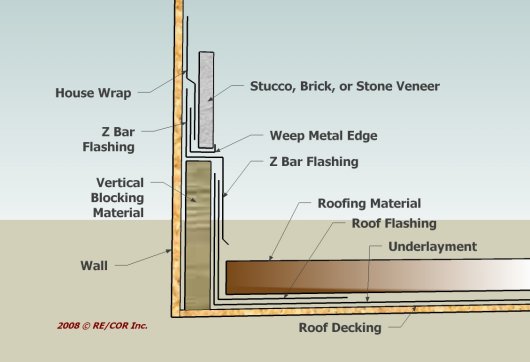
Yes, there will be a little more exposed metal along the rake (side) walls, head walls, and chimneys but this Through the Wall (Z Bar) Flashing will look very nice if pre-painted. Besides, anyone can tell from 2 blocks away that you have a Veneer on your walls if you do not see metal. All real Brick or Stone through the roof walls and chimneys and those that set on lintels always have metal exposed at all intersections with the roof.
For more information on how to properly flash roof to wall intersections see the web pages Roof to Wall Flashing and Tile Eave to Rake Wall Installation.
Visit our
Roof Inspection Services
web page
and the many other web
pages throughout this website to find
answers to your roofing questions and
solutions to your roofing problems.
Page Revised/Updated 2/27/2023