 |
 |
 |
 |
 |
 |
|
 |
 |
 |
 |
 |
||
Incorrect Nailing of Roofing Materials and Accessories
The correct nailing (fastening) of roofing materials and accessories to the Manufacturer's Installation Specification/Instructions, Building Codes, and other Industry Standards is of the utmost importance. There are many things that can go wrong with the installation of a new roof covering when the materials and/or accessories are not correctly fastened (nailed or screwed). Not only could the new roof covering installation fail from things like wind blow off but it gives the manufacturer of the material and/or accessories a way out of standing behind their warranty.
We have found performing many thousands of of Roof Inspections that VERY FEW Contractors fasten roofing materials and accessories correctly. Below are some examples photos and videos of roofing materials and/or accessories being incorrectly fastened and correctly fastened:
Field Laminated Asphalt Shingle Nailing Videos
In this video listen to how rapidly these roofers are nailing the field asphalt shingles down with a pneumatic nail gun. Basically if it sounds like a machine gun (very fast firing so that it is hard to tell how many nails were placed into the field shingle) odds are more likely than not that the nails are incorrectly placed and/or driven.
In this video the sound of the nail gun firing is somewhat slower but it's steady and distinct with every nail driven. The nails are being correctly placed and driven. It is a falsehood believing fast nailing is the best way to get more roofing materials installed in a day - it does not add that many more squares installed per day. The quicker you set the shingle in its place is what really counts for the greater amount of work done. Besides a job worth doing is a job worth doing right.
Field Laminated Asphalt Shingle Nailing Photos
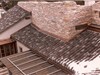
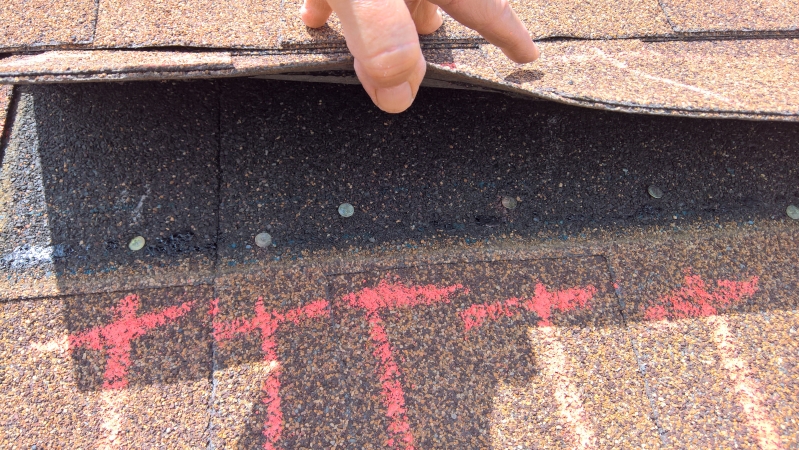
Here are some photos of field laminated asphalt shingles that are incorrectly nailed with too many nails per shingle and/or the nails are not placed to the manufactures installation pattern, placed too high missing the second part of the laminated shingle, placed too far from the ends of the shingle, over driven, under driven and/or driven crooked.
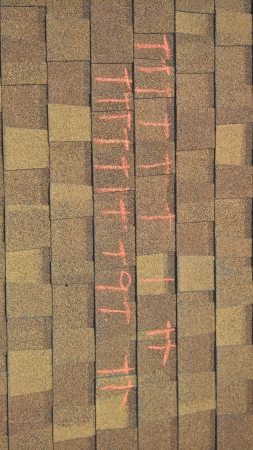
Field Laminated Asphalt Shingle Nails: Incorrect placed and/or driven nails indicated by T marks on the shingles. In one shingle here they used 9 nails instead of the standard 6 and only one of the nine was correctly placed and driven.
Field Laminated Asphalt Shingle Nails: Misplaced nail pattern, placed too high, over driven, and/or driven crooked.
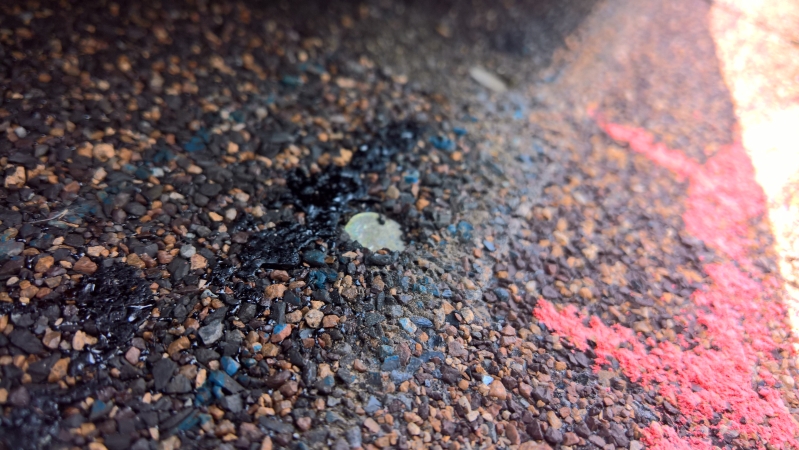
Field Laminated Asphalt Shingle Nails: Both severely over driven.
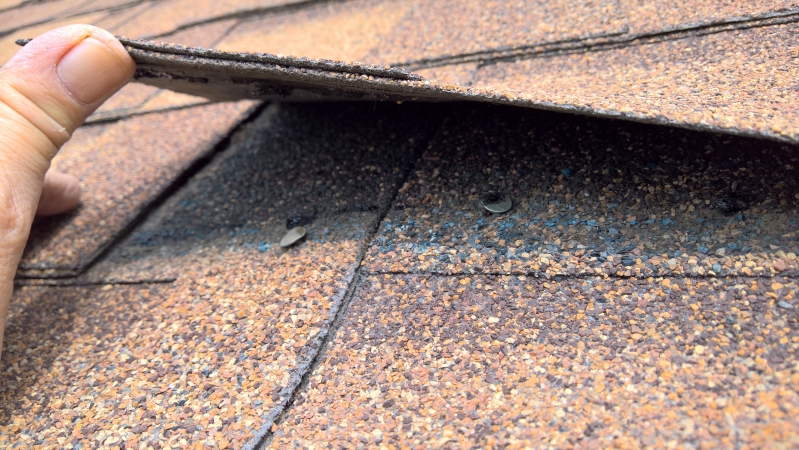
Field Laminated Asphalt Shingle Nails: One driven crooked, both under driven, and one placed too high missing 2nd part of laminated shingle.
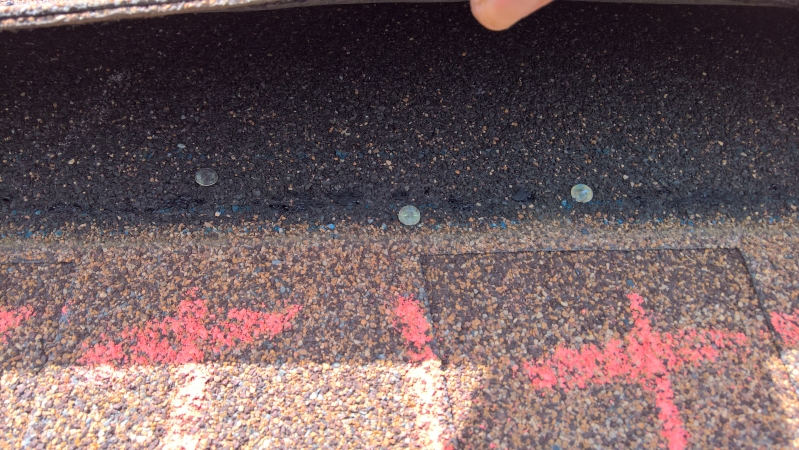
Field Laminated Asphalt Shingle Nails: Center Nail correctly placed and driven. The two other nails are placed too high missing 2nd part of the Laminate Shingle.
Hip and Ridge Asphalt Shingle Nailing Photos
Here are examples of Hip and Ridge Asphalt Shingles incorrectly nailed.
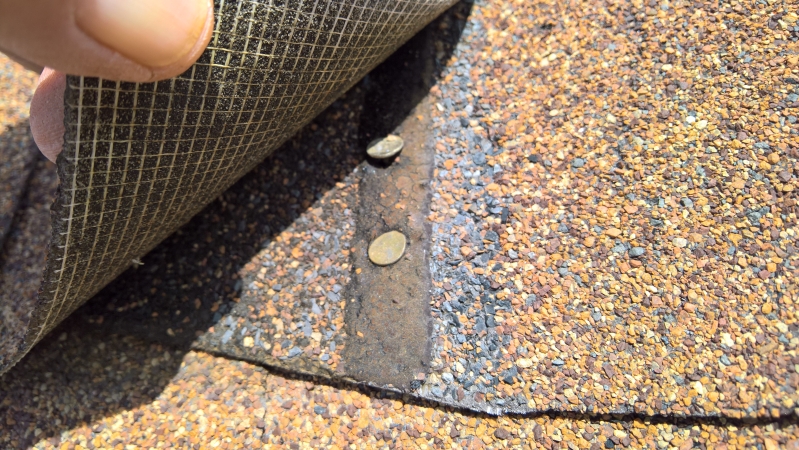
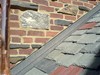
Hip and Ridge Asphalt Shingle Nails: One ridge shingle nail is crooked and both are incorrectly placed into the factory sealant.
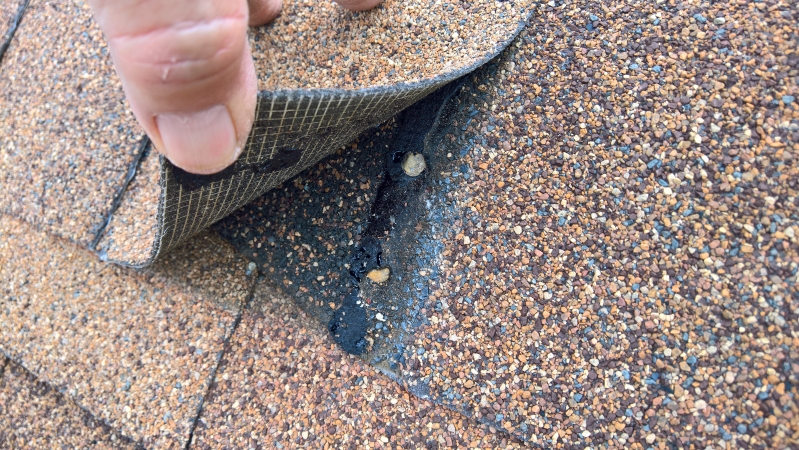
Hip and Ridge Asphalt Shingle Nails: Hip and Ridge Shingle Nails are both over driven and placed incorrectly into factory sealant.
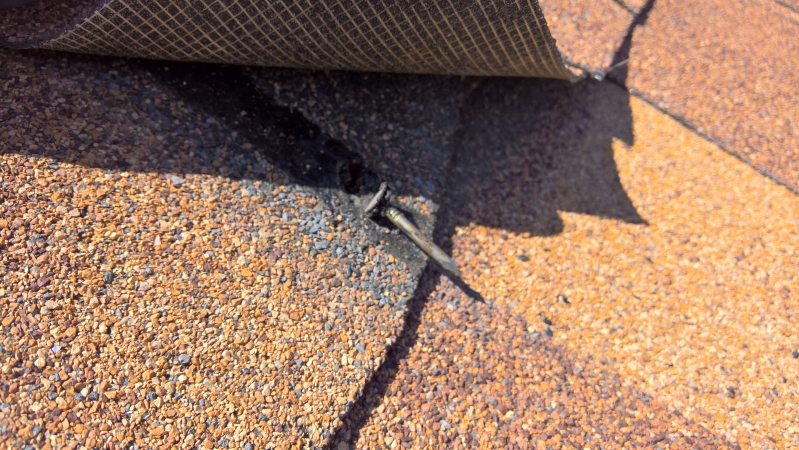
Hip and Ridge Asphalt Shingle Nails: Many times when Hip and Ridge Shingle Nails are found over driven it is because the nails are too short not penetrating through the field shingles and through the half inch roof decking as is required by Industry Standards. Nails should be a minimum of 1 1/2" long or longer depending on the thickness of the field and Hip and Ridge Shingles. The Hip and Ridge Shingle Nails were found to be too short on this roof - only 1" long.
Visit our
Roof Inspection Services
web page
and the many other web
pages throughout this website to find
answers to your roofing questions and
solutions to your roofing problems.
Page Revised/Updated 2/27/2023